Pages

Showing posts with label science 2019. Show all posts

Thursday, 14 November 2019

rocks

Rocks


What are rocks?
Rocks are solid materials which mostly occur naturally. These are minerals that are non-living substances Minerals are like concrete building blocks. It's also possible to form certain rocks from just one mineral. Others are formed by more than two or more minerals that are combined Minerals appear like fragments of various sizes, or particles, some minerals may also be powdery in rocks too. Many rocks have very small minerals, giving the rock a smooth and even texture. Other rocks have a lager mineral grain which gives it a rougher texture. There are three different types of rocks called igneous, metamorphic and sedimentary rocks.

Igneous rocks:
Igneous rocks are formed from magma. The magma is forced up and some time out of the earth crust. When the magma cools crystals begin to form and the magma solidifies. Depending on how fast the magma cools will vairy for how big the crystals are. Eg; Basalt is formed from lava which contains small crystals because it cools fast on the surface, this makes the rock an extrusive igneous rock because it is outside of the volcano. Whereas granite has large crystals as it is formed by slow cooling inside the volcano making it an intrusive igneous rock.

Extrusive- Outside or exiting.
Intrusive- Inside something.

Metamorphic rocks:
When sedimentary rocks become buried deep in the earth's crust they are subjected to high temperatures and pressure. Over millions of years, this causes structural and chemical changes which form metamorphic rocks. Great pressure and weight of the rock above causes crystals to form in parrel planes or band. Metamorphic rocks are usually more resistant to erosion than sedimentary rocks. Eg; Shale is changed into the metamorphic rock slate and chalk to marble or sandstone to quartzite.

Sedimentary rocks:
Sedimentary rocks are formed from grains of eroded rocks or undecomposed parts of animals or plants. These sediments settle in layers usually underwater. Once the layers build they get old and become buried under newer layers, the more layers the heavier and the weight squeezes out water.
The particle of them ends up cementing together. This process takes you to millions of years. Eg; mud is compressed into shale and shellfish into limestone, or sand into sandstone.

eroded-Graduly wore away by natural agents.
undecomposed- Not left to spoil.
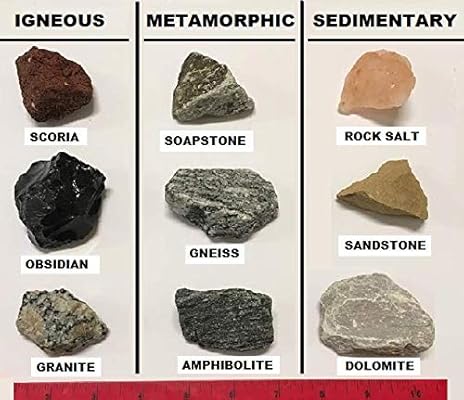
Image result for sedimentary rocks
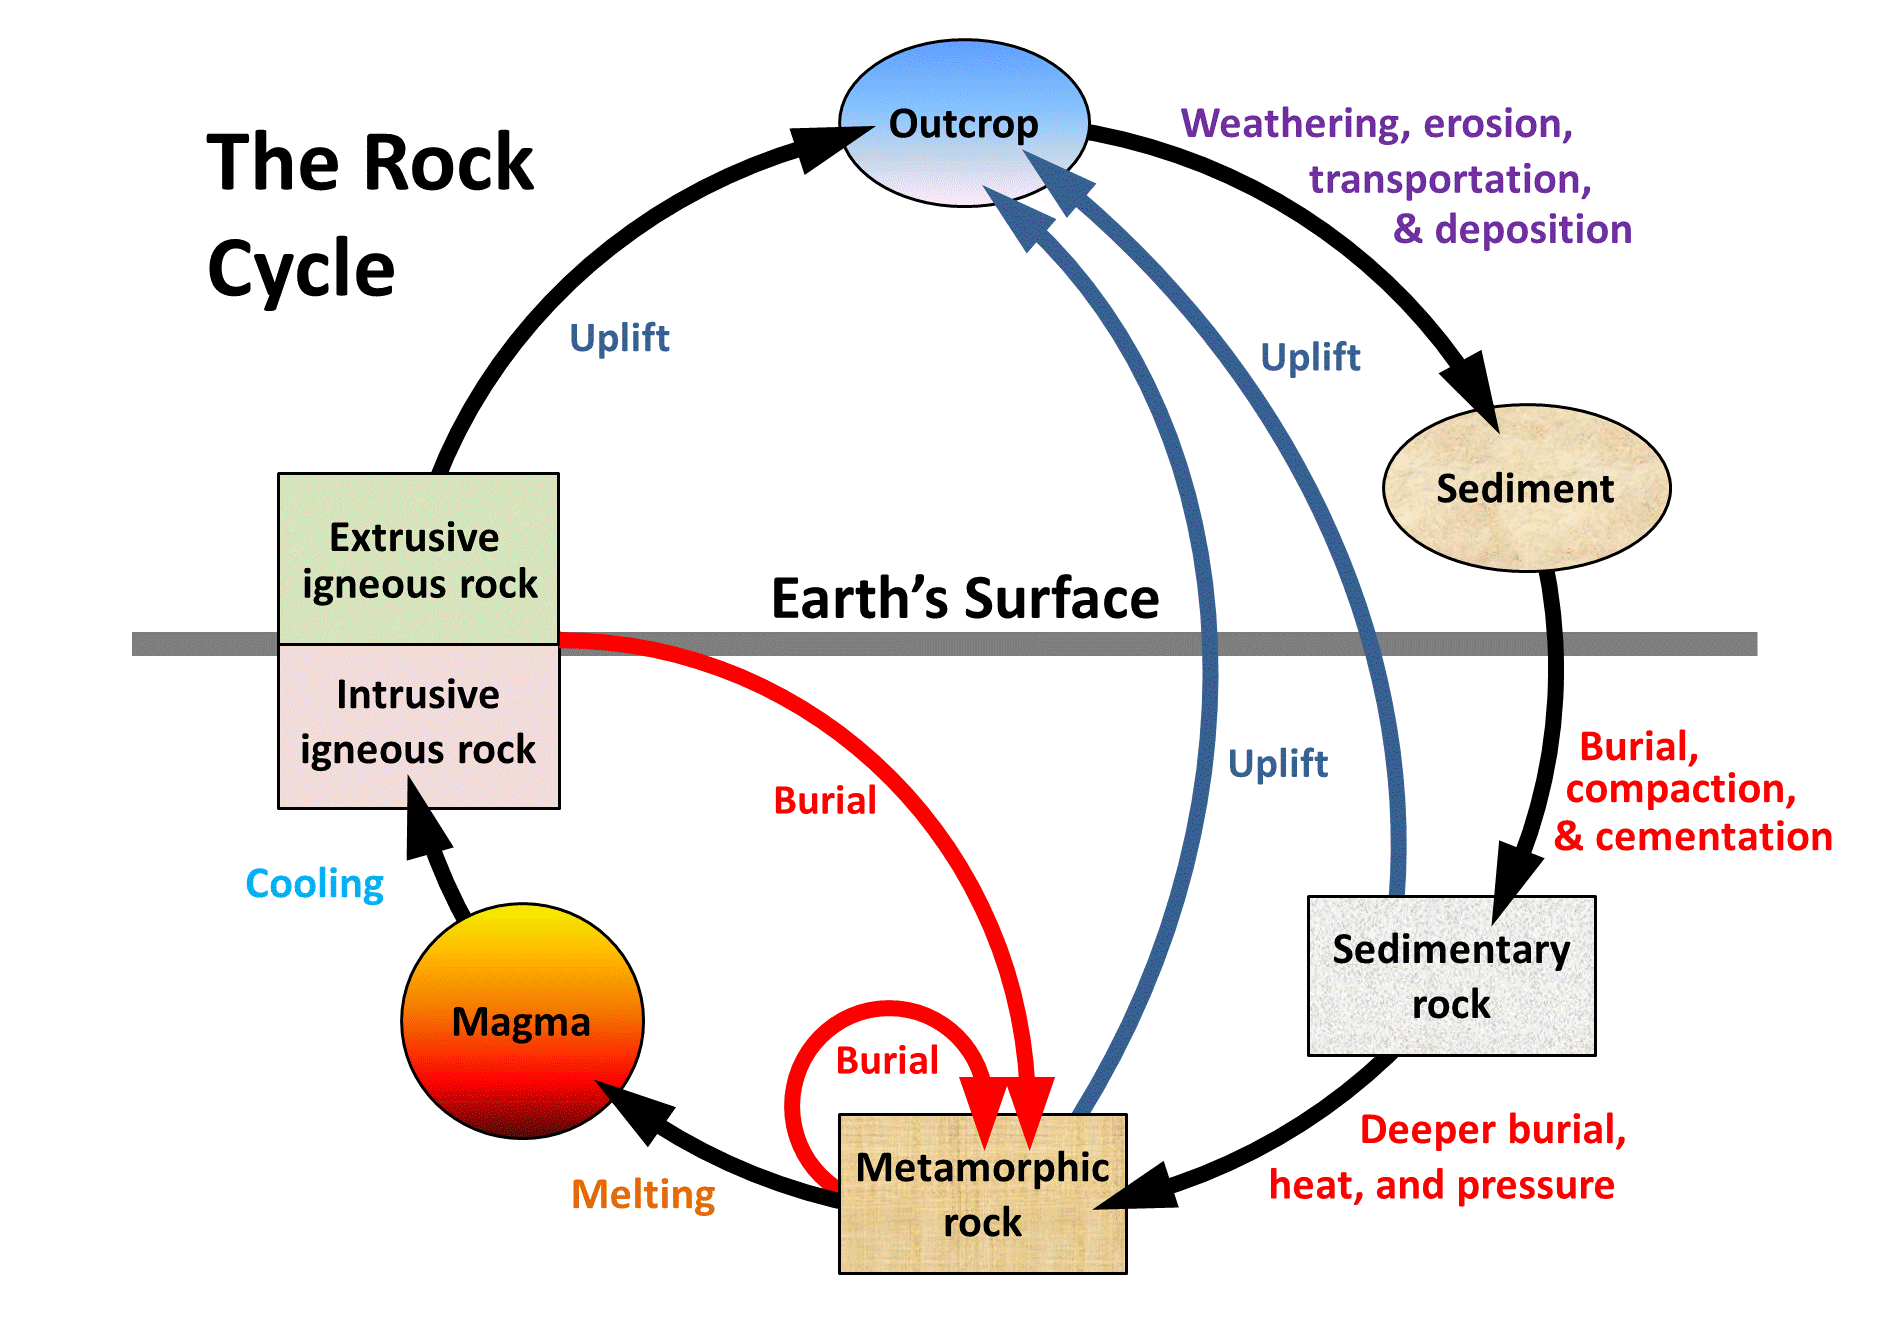
Rock cycle
Image result for rock cycle
Rocks we had to know

  1. Pumice 
  2. Basalt
  3. Granite
  4. Obsidian
  5. Conglomerate 
  6. Limestone
  7. Mudstone
  8. Marble
  9. Quartz
  10. Slate
  11. Schist
  12. Gneiss
  13. Sandstone

Pumice-Igneous

What is pumice?
Pumice is a light coloured extrusive igneous rock that has a lot of tiny holes in it that forms in a volcanic eruption. The holes are formed because the rock its self has a lot of gas in it. Many specimens have a high enough porosity that they can float on water until they slowly become waterlogged.

How does the pumice form?
The pore spaces in the pumice are vesicles. The vesicles are gas bubbles that were trapped in the rock when cooled at a fast pace. As the gas bubbles escape the lava becomes frothy. The pumice cools and formes so fast that the atoms in the melt don't have time to aline themselves into a crystalline structure. 

What can you use pumice for?
You can use pumice for lightweight concrete blocks and other lightweight products. Lava soap, that you wash your hands with the little tiny bits of pumice, Sandal feet, you use sandal feet to wash your feet and get rid of the dead skin. 

Where can you find pumice in New Zealand?
You can find pumice nearly anywhere around the coastline of New Zealand because it can float and can get taken around but the water. The main spot that you can find in is I the central North Island. The beaches of Lake Taupō have pumice sand and in Waikato and Bay of Plenty, there was 173000 pumice found in 2003. 


Marble-Metamorphic

What is marble?
Marble is a metamorphic rock that forms when limestone is under heat and pressure of metamorphism. 

How does marble form?
Marble forms at convergent plate boundaries where large areas of Earth's crust are exposed to regional metamorphism. Some marble can also form by contact metamorphism when a hot magma body heats adjacent limestone or dolostone.

Dolostone-Dolomite, also known as "dolostone" and "dolomite rock," is a sedimentary rock composed primarily of the mineral dolomite
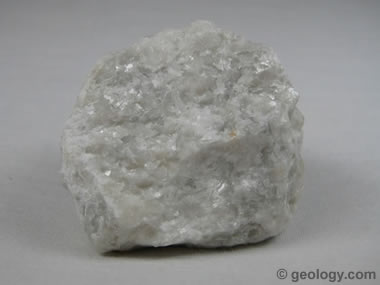
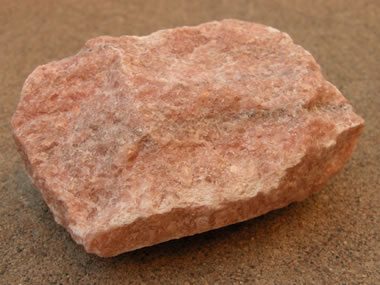
Gray MarblePink Marble
Sandstone-Sedimentary
What is sandstone? 
Sandstone is a sedimentary rock composed of sand-size grains of mineral rocks or organic rocks.  It also has a cementing material that combines the sand together. Sandstone is one of the most commonly found sedimentary rock. It is often mined and used for construction material. 

What is sand?
Sand is a granular material composed of finely divided rock and mineral particles. It is defined by size, being finer than gravel and coarser than silt. Sand can also refer to a textural class of soil or soil type.
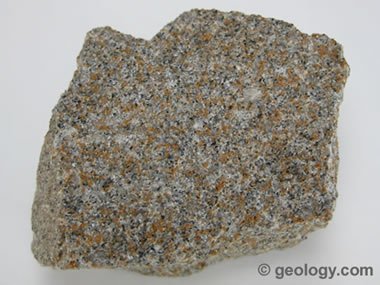
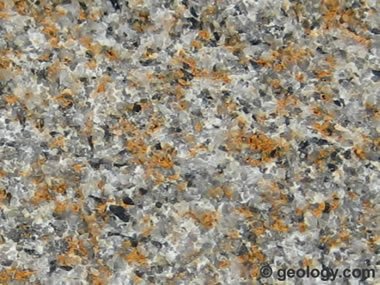
SandstoneSandstone close-up

Tuesday, 10 September 2019

Catapult

Catapult

Aim: To calculate the speed.

What we want to happen: 
  • We want to be able to make a catapult.
  • Calculate the speed it is flying at.
  • Have a competition who can make the best one.
  • Whos can go the farthest and fastest.
  • Who can catch the most marshmallows in their mouth
Equipment:
Creates one catapult
  • Popsicle sticks (Around 10)
  • Rubber bands (Around 5)
  • Plastic bottle cap (1)
  • Something to catapult Eg: Small stone, Marshmallow (As many as you want)
  • Hot glue
  • Plastic cups (4)
Method:
We didn't make it exactly like this but it was similar.
Results:
Marshmallow (Amount)
Test 1
Test 2
1
2m28cm
3m
2
2m11cm
2m
3
1m71cm
1m22cm
4
1m40cm
1m23cm
image.png
Test 1: In this chart, you can see the blue line which represents how many marshmallows are used, and the red line is the distance of how far the marshmallows went. As you can see from this chart the distance of the marshmallow decreases as the number of marshmallow increases.
image.png
Test 2: In this chart, you can see the blue line which represents how many marshmallows are used, and the red line is the distance of how far the marshmallows went. As you can see from this chart the distance of the marshmallow decreases as the number of marshmallow increases, but unlike test 1 the distance decreased faster and then stays at the same distance and then at the end, it goes up a little bit.

Photos:

Monday, 22 July 2019

copper into silver and gold

Turning copper into silver and gold 🥈🥇

Aim:  To make a coin turn into silver and gold.
Equipment: Bunsen burner, Tripod, Heat mat, Beaker, Gauze mat, Copper Coin, Scissor Tongs, wire wool, tweezers, 100mls of sodium hydroxide solution, 5grams powdered zinc, Beaker with water, paper towels

Method:
  1. Place a copper coin on the table and use some wire wool to clean the copper coin off.
  2. Next, get the sodium hydroxide and powdered Zinc to create sodium zincate. Pour the zinc powder into sodium hydroxide and stir.
  3. place the beaker onto of tripod and gauze mat then turn on your Bunsen burner.
  4. Heat the solution till it at boiling point.
  5. Take the Bunsen out from under while there's still some zinc left in the bottom of the beaker.
  6. Pop the coin into the solution so its in contact with the zinc at the bottom.
  7. take the coin out after a few minutes.
  8. Rinse the coin off into some cold water.
  9. Dab the coin dry, take off any lumps of zinc (By now it should be silver)
  10. Put the coin in the top part of Bunsen burner flame and very gently heat it. (Now it will be gold)
Try 1
Notes: Need to take all the zinc sulfate off.
(Last time I didn't take it all off)
Try 2
Notes: I did it and I finished it.
Observation:

Dissociation:
While doing this I found it fun and interesting because you were turning a 10c copper coin into silver and then gold if you wanted to. When I was setting the experiment up I found that you had to be very specific with what chemicals you had to use (with all experiment you have to be specific but with this one I found you had to be extra careful), in the equipment I wrote down Sodium hydroxide solution but I didn't say how strong the concentration had to be. When I went and showed the teacher he said I had to do some more research into the chemical and find out what concentration it was. I couldn't find it so the teacher just gave me a medium concentration and it worked out fine for the experiment. During the experiment, I found it fun to watch the coin turn from copper to silver, even though you can't really see it happening because the solution you mix is all black/grey and you can't see through it. Once you take it out you can see the silver. When washing it and drying it off the first time doing the experiment I didn't take all the sodium zincate off and it burnt and rusted over top of the flame when turning it to the gold. The next day I did the whole experiment again to get it right so I had a good looking coin. This time I made sure to wash all the sodium zincate off and didn't keep it over top of the flame too long.


Evaluation:
If you are wanting to do this experiment then I would really recommend doing more than 1 coin so you can get at least one good looking on and you don't have to the experiment more than once, I would say to do at least 6-8 coins and maybe keep some silver as well so you have some silver and some gold. You also want to make sure you get all the sodium zincate off so you don't burn and rust your coin. I think this is defiantly an experiment I would want to do again and if I did do it I would make sure the sodium zincate is off and it is cleaned properly.

Alloys
Alloys are a mixture of two or more elements one or more of which is a metal. Alloys are usually harder than the metal they contain. 
Some common alloys                                                                                        


Alloys 
Metals 
Properties 
Uses 
Tungsten steel 
Tungsten, iron, chromium 
Very hard, resists 
High-speed drill bits 
Stainless steel
Iron, nickel, chromium 
hard, very shiny lustre, does not corrode 
Cutlery 
Bronze 
Copper, tin 
Hard, resists corrosion even in salt water
Ship propellers
Brass
copper, zinc
good  acoustic properties 
Musical instruments 
Duralminium 
Aluminium, copper, magnesium 
Lightweight, strong, malleable 
Aircraft bodies 
  

Tuesday, 4 June 2019

making salt

making salt

Aim: To produce copper sulfate salt by reacting copper oxide with an acid.
Equipment: Copper oxide powder, dilute (0.5 mol L-1) sulfuric acid, 50mL measuring cylinder, two 100 mL beakers, Bunsen burner, tripod, gauze mat, funnel, filter paper, thermometer, spatula, evaporating basin, stirring rod.
Method: 

  1. Add 20mL of sulfuric acid to a 100mL beaker. Heat the acid until it reaches degrees. Turn off your bunsen burner.
  2. Once heated, use a spatula to add pea-size portions od copper oxide to the beaker. Stir the mixture for 30 seconds.
  3. Repeat step 2 until no more will dissolve. Allow the beaker to cool.
  4. Fold the filter paper and place it in the funnel. Place the filter funnel into the second beaker.
  5. Make sure the beaker is cool enough to hold at the top. The contents should still be hot. You may need your teacher to complete this step.
  6. Gently swirl the contents of the beaker to mix, and then pour into the filtered paper in the funnel. Allow filtering through.
  7. Rinse the beaker you used to heat the mixture previously, and place it back on top of your tripod filled with 50-60 mL of water.
  8.  Place the evaporating basin on top of the beaker and carefully pour some of the solutions from the beaker into the evaporating basin.
  9. Gently heat the beaker until the solution in the evaporating basin has reduced by half.
  10. Leave the evaporating basin to cool. Once cool, move the evaporating basin to a warm place where it will not be disturbed (i.e. a window-still) and observe over the next few days. Blue copper sulfate crystals should form.
Observations:

Discussion:
This was a fun experiment to do and when doing it I saw the copper oxide dissolve so many times and we had to like 3-5 pea-size full of the copper oxide. We then had to wait for it to get to 70 degrees when waiting we were a bit worried because we didn't want it to explode and crake the glass because it was getting really hot, and last time we did this experiment it happened to a few people in our class. In my group, I was the one that had to fold the filter paper and we weren't told how to do it and I knew that there was a certain way to fold it so it would actually work. So I had to guess, I ended up getting it and we were all ready to go. During the experiment, the reaction that was happening was copper oxide+ sulfuric acid ---> copper sulfate+water
 (CuO + H2So4--->CuSo4+H2O).
When we had finished the experiment we were waiting for it to cool down but someone in our class decided to touch it and tried to move it (Don't do that) when they went to move it they spilt it and it went on them and on the floor, they had to wash it off and our experiment was ruined and it didn't work. The next day we went to go and do it again but there was no more solution left and we couldn't do it. So I just took photos of other peoples experiments and how there's went and how it was meant to look.   

Evaluation: 
If you do this I would recommend making sure your measurements are accurate and correct. I would also say wait for the beaker to cool down before touching it so you don't spill anything. If I was to do it again I would make sure no one touches it when it is hot and I would make sure I get good photos so they are more clear and it isn't all foggy and blurry.  

Monday, 13 May 2019

burning magnesium

Burning magnesium 

Aim: to see the change in the weight of the magnesium.

Equipment: 
scales
bunsen burner 
scissor tongs 
beaker
lighter/ matches
heatproof mat
safety glasses 

Safety:
  • Have your hair tied up if it is long.
  • Wear safety glasses. 
  • Don't go to close to the flame.
  • If you forget to put on safety glasses don't look at the light of the magnesium burning.  
Method:
  1. Collect your equipment and set up your heatproof mat under your bunsen burner, do not light the bunsen.
  2. Once set up with all your stuff cut and put your magnesium inside the medium size beaker and weigh on your scales. (Take note of the weight.) 
  3. Once you have set up and you already turn your bunsen onto safety flame, then light your bunsen burner and turn it to the blue flame. 
  4. When done that take your magnesium out of your beaker and hold it with the scissor tongs.
  5. You then want to hold the magnesium over the middle of the flame and wait for it to catch fire.
  6. When your magnesium has caught fire you want to then put it into the beaker and wait for it to go out and turn to ash.
  7. You may need to repeat this a few times.
  8. When all or most of the magnesium is ash and it is inside the beaker you then want to weigh it again and compare the different weights.
Observation:


Discussion:
When I was doing this I found that you had to be very precise and careful when you weighed your magnesium because if you did it wrong or something was different then when it came to doing it again and getting the results at the end it wasn't correct. We also found out that if you don't burn all/ most the magnesium or don't get as much of the magnesium off the tongs then you will end up with the wrong results. At the start of our expement, we were using paper instead of the beakers but we found that when you put the magnesium ash onto the paper it caught fire so we decided to use the beakers instead. When doing this the magnesium is meant to get heavier than the first time you weighed it, but ours ended up getting lighter because we didn't burn all of it and we lost some of it when it got stuck to the tongs. My group started at 53.49 and we ended up with 53.39 so ours got lighter.

In therey, it should have gotten heavier.
Evaluation:
If I was to do this again then I would want to make sure I burn all the magnesium and get a more accurate result to what it should be. If you were wanting to try this then I think you need to pay close attention to the magnesium and make sure you burn most of it. I would also say that you might want to do a little bit of research on this just so you have a little bit of an idea on what you are meant to be finding out and what is actually going on when you are doing this.  


Thursday, 4 April 2019

Heart Attacks

Heart Attacks


What is a heart attack?
A heart attack is when your coronary artery gets blocked up which stops the flow of blood going to your heart, having a heart attack can cause the heart to stop which puts you into cardiac arrest.
Symptoms you can have during a heart attack:


Tightness or aching sensation.
Shortness of breath. 
Cold sweat.
Lightheaded or dizziness.
Shortness of breath.
and many more that you could have. Heart attacks can vary from mild or server symptoms, there are some people that are less likely to experience symptoms. People that are less likely usually are either old or have diabetes although this doesn't mean that they can and won't experience symptoms, they might find them selfs feeling shortness of breath. You can feel the discomfort when having a heart attack around the centre or towards the left side of your chest. This can also spread to other areas. It can go to your arms, neck, jaw, and back.

Treatment for heart attacks:
  • Aspirin to help the blood from clotting.
  • Nitroglycerin to help the flow of the blood.
  • Treatment for chest pain.
  • Oxygen therapy. 
Drugs likfibrinolytic or thrombolytic agents are another option of treatment this helps break down the blood clots. If you were to choose surgery then one of the options you will have would be coronary artery bypass graft this is when the doctor will get a new blood vessel from another body part to bypass the blocked coronary artery.


Diagnosed:
  • X-rays and blood tests.
  • Echocardiography, "echo" looks at the heart using ultrasound.
  • ECG: This traces the beat and rhythm of the heart by measuring its electrical activity moving from the top to the bottom of the heart.
What is angina?

Angina is like a similar chest pain that occurs when having a heart attack. Instead of your coronary artery clogging up, it is when your vessels narrow. If you have angina you are at the risk of having a heart attack and the most common form of angina is temporary this is called stable angina if you have unstable angina then you are at a greater risk of having a heart attack.

What is heartburn? 
Heartburn is usually a burning pain caused by acid reflux. Most people will think that heartburn is related to your heart because of the feeling of the pain but it actually isn't. In the stomach, there is something that is produced called mucus this is to help protect the lining from the acid that helps digest food. The food pipe lakes this lining which cause acid reflux this can damage the lining. Why people with acid reflux experience pain is I think still unknown it could have something to do with your acid-sensitive nerves causing you to feel pain.

Heartburn symptoms:
The burning pain usually will start above your stomach and can possibly reach up to the back of your mouth. 
  • Nausea
  • Bloating 
  • Belching
Different symptoms between heartburn and heart attack:


  • Heartburn can be relieved by drugs that can reduce acid levels in the stomach.
  • A heart attack does not cause bloating or belching, but these can happen with heartburn.
  • heartburn tends to be worse after eating and when laying down, but a heart attack can happen after a meal, too.
Heart Dissection

Aim: My group is doing a heart dissection of a sheep. My aim when doing this I want to be able to successfully dissect a sheep's heart. 

Safety:
  • Look out for where you make cuts (DONT CUT YOURSELF). 
  • Wash your hands.
  • Right equipment.
  • Hair tied back.

Equipment:
  • Goggles
  • Gloves
  • Dissection scissors 
  • Scalpel 
  • Dissection tray
Instructions: Hard


  1. Use scissors to cut through the side of the pulmonary artery and continue cutting down into the wall of the right ventricle.
  2. With your fingers, push open the heart at the cut to examine the internal structure. If there is dried blood inside the chambers, rinse out the heart.
  3. Locate the right atrium. Notice the thinner muscular wall of this receiving chamber.
  4. Find where the inferior & superior vena cava enter this chamber & notice the lack of
  5. valves.
  6. Locate the valve between the right and left atrium.
  7. Use your fingers to feel the thickness of the right ventricle and its smooth lining.
  8. Find the septum on the right side of the right ventricle. This thick muscular wall separates the right & left pumping ventricles from each other.
  9. Inside the right ventricle, locate the pulmonary artery that carries blood away from this chamber. Find the one-way valve called the pulmonary valve that controls blood flow away from the right ventricle at the entrance to this blood vessel.
  10. Using your scissors, continue to cut open the heart. Start a cut on the outside of the left atrium downward into the left ventricle cutting toward the apex to the septum at the centre groove. Push open the heart at this cut with your fingers & rinse out any dried blood with water.
Instructions: Easy

  1. Get some newspaper to line the table.
  2. Put on gloves to protect our hands.
  3. Get the sheep heart and lay it flat on the newspaper-covered table.
  4. Grab the scalpel.
  5. Cut the top layer/s of muscle/s, The scissors might be better.
  6. Then identify the heart chambers and the other interior things.
  7. Discard the heart.
  8. Clean up the utensils and take the newspaper off the table.
  9. Take off gloves and scrub the living crap out of the table.
  10. Also, wash your hands.
Observation:


Discussion:

The results of doing this dissection were good. I found it fun to explore and cut the heart. When doing this I was able to identify the right atrium, right ventricle, left atrium and left ventricle. I was also able to see the arteries, veins and capillaries I even was able to stick my fingers down them and identify them by feeling how thin or thick the walls were. The way blood travels around your heart is by it entering through the vena cava and then the blood flows to the right atrium, from there the blood goes to the right ventricle. Before the blood travels to the lungs it has to go to the pulmonary artery. Once at the lungs the blood goes to the pulmonary veins which enter the left atrium. Blood flow from the left atrium to the left ventricle. The left ventricle then contracts and sends oxygenated blood to the body through the aorta.  

Evaluation:
If I was to do this again I would want to try the harder instructions and try to identify more things about the heart and possibly see if I can find some health problems that the animal had. If you were wanting to try and do this then I think you should start with the easy instruction and work your way up.You could even try and find some of the tendons and veins and maybe try and make your cuts look nice and clean so you dont cut though anything you want to look at. Where does the thumping sound of your heart come from? How many times a day does your heart recycle your blood?


    Friday, 22 February 2019

    DNA🔬

    🔬DNA 🔬


    What is DNA?
    The structure of deoxyribonucleic acid (DNA) in the same as all living things. It is said that it looks like a twisted ladder (non-scientific) it can also be known as a double helix which is the scientific name for it. DNA is made up of simple repeating units called nucleotides. A nucleotide is made up of sugar, a phosphate and some type of base. A DNA strand side is made up of sugar and phosphate these are joined together by chemicals called nucleotide base. 
    DNA replication?
    DNA replication is when a DNA clones itself during cell division (Cell division is when a parent cell divides into two more daughter cells). When the enzyme unwinds the parent DNA new nucleotides are brought in. When in they bond with the base that is on the parent DNA, because of this they end up bonding together to create a new strand. When this process is finished in the end there will be two more new molecules of DNA. These new DNA molecules are both exact copies of the original molecule. 
    I got this information from:https://www.yourgenome.org/facts/what-is-dna-replication 
    Double helix mad out of pipe cleaners:
    Double helix: a pair of parallel helices intertwined about a common axis, especially that in the structure of the DNA molecule.

    Aim: to make a double helix out of pipe cleaners Succesful.

    Equipment: Red, Blue, Yellow and green pipe cleaners, scissors. 
    Method: 


    1. Find some pipe cleaners.
    2. Separate the pipe cleaners into colour coordination piles.
    3. Get you blue and red pipe cleaners and twist them around each other. (do it twice)
    4. Twist the yellow and green pipe cleaners around each other. 
    5. Cut the green and yellow pipe cleaner into 7-8 cm size.
    6. Lay both the red and blue pipe cleaners side by side so they are parallel from each other.
    7. Put the green and yellow pipe cleaners in between them.
    8. Connect them at the ends.
    Observation:
    While making double helix this I found it hard to get the right length.
    What I might do next time?
    If I was to do this again I think I would want to do something more challenging like extracting DNA from fruit instead of making something out of pipe cleaners. If I had to make a pipe cleaner one again I would like to get the colours different so they are more similar to a real DNA strand.